Wednesday, April 10, 2019

Long Time Having Too Much Fun

We just retrieved the boat last week after the Havasu sailing season. We let the noisy power boats have the lake April till October. From Nov 15th till now we spent about 14 nights on the boat. It is very comfortable.

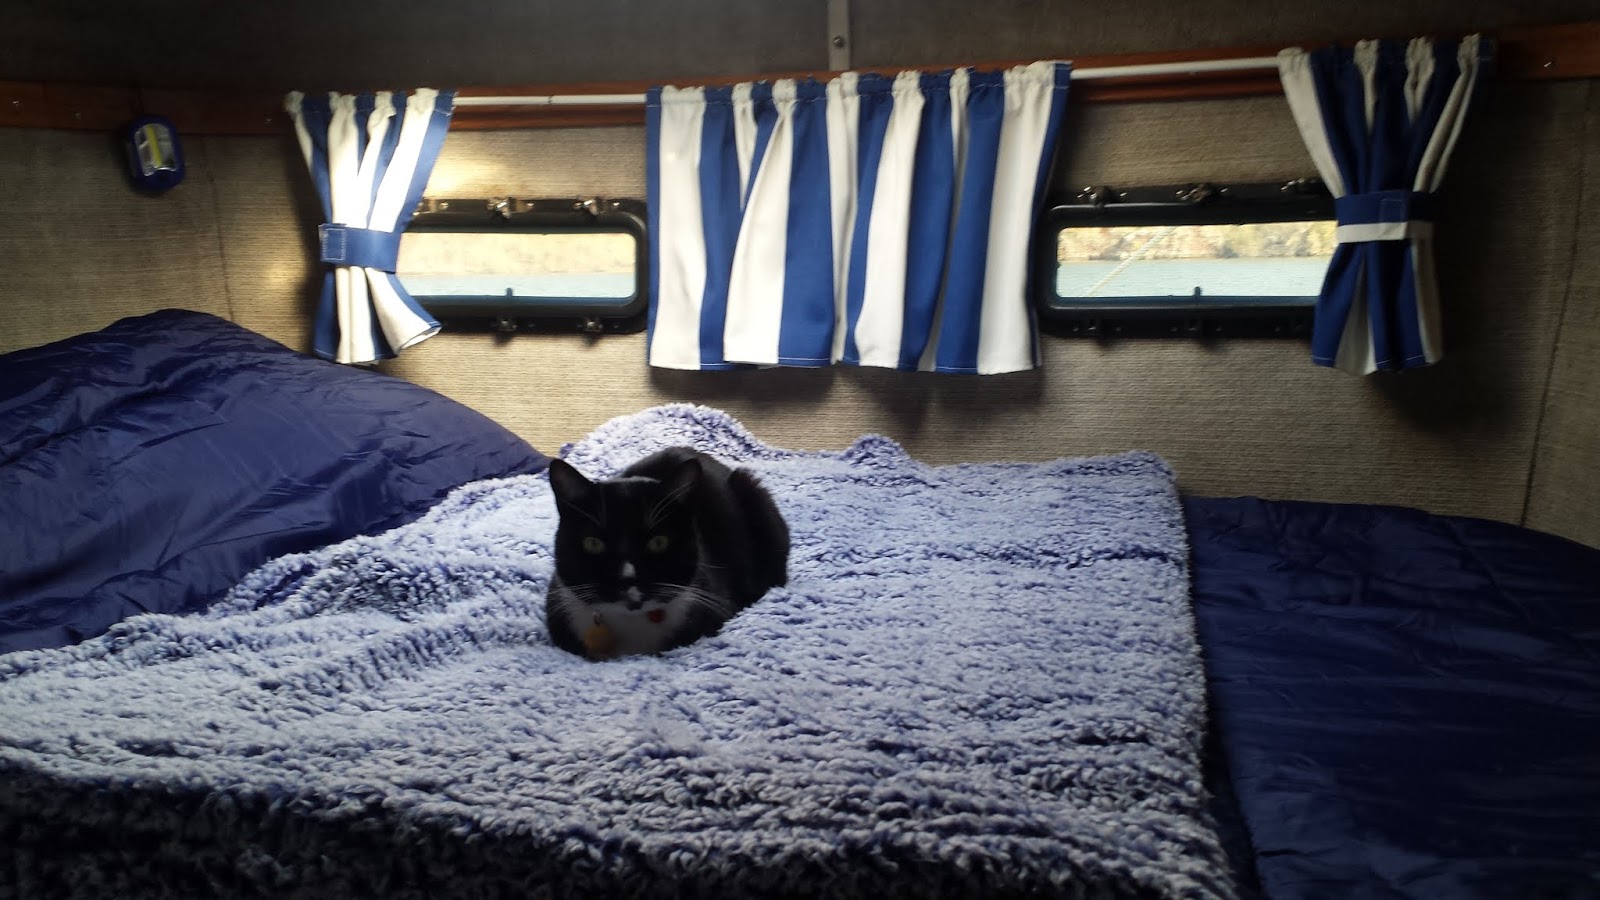
Looking forward from pass through, Lee did a great job on the interior.


The aft birth is purrr-fect for our boat cat Oban.

Another link to a Facebook page with some pictures of us ( and a couple of others) sailing. 

https://www.facebook.com/photo.php?fbid=1268225633350829&set=gm.2108280769240629&type=3&eid=ARCbFl-4j-AEmdt2MZwhGN2yBWOoLU4L3Ti5Bl2XQFChdy62DQUMAyEjP3UBlaWU1ttlhrx62am9zFCm


Monday, September 10, 2018

The New Cushions are Done!

Well after a long silent period I am happy to announce that I have finished the new salon cushions for the shit-boat.  I had been dreading starting on these because of the many yards of custom piping that were needed - over 2000 inches total (55.56 yards!).  However, I found a trick way of doing this really quickly and within a matter of hours had a pile of the stuff.
In case anyone wants to know how to do this.  here's a link to a video...

https://www.youtube.com/watch?v=PZUJknZ6aC0

I started this project around the first of August and finished it just yesterday (9/9/18) with a good week's break during the latter part of the month when RT and I help our friend Brent move his 40' sailboat up to Alameda, CA.  So all in all, it really didn't take too long and this included cutting the foam, fabric, and sewing it all up.  Here's the finished product....it's not going in the boat yet because there's still more dusty, dirty work to do in there.  The fabric is from DIYupholstery.com and it's called "Duratex" - very heavy duty stuff - stain, UV, and mildew resistant.  The color is "Caribbean Blue".  Sailrite.com has wonderful how-to videos for doing this sort of thing.


So before I started the cushions I spent the first several weeks of summer (110+ degrees here in Havasu) inside the boat, sanding, filling, priming and painting all the old dark laminate surfaces.  Some of the stuff had to be removed because it de-laminated.  So much fun with the hot summer - using a heat gun in a small enclosed space.  Yuck.  The "head" was the worst.  After removing the laminate and sanding, I found the plywood was wavy so then had to fill with Bondo.  Then sand.  Then fill more.  Then sand more.  I hate sanding Bondo, really, really hate it!  Safety equipment was a must....don't I look glamorous?  Love the respirator!


This spring we had purchased a window Air Conditioner from Home Depot and installed it in the front hatch so at least I could keep the temperature inside down to 84 degrees most days.

I don't think these photos do justice to how much better Shit-boat looks inside now with the new paint, but here you go....


 I've decided to re-use the original cabinet doors, just re-laminate them with a speckled-gray Formica ("Crystal Flint Etchings") with new pulls and hinges.  I will also need to fabricate a few new cabinet doors for some that are missing.  We found a site that sells "t-molding" which is what was used for trimming out the doors, T-molding.com, of course!

Well, gotta get back to work.  This morning I'm patterning for the aft-berth mattress.  The 6" memory foam mattress is laying in our front room waiting to be cut.

Saturday, August 11, 2018

Progress,,,, Finally

The trailer is Titled and Licensed! MVD inspection was a piece of cake. The person who did the paperwork, Terri, had never seen $5000 in receipts for a home built trailer before.


Spent the day getting the trailer under the boat. Had to re-position the jacks for every cross member. I must have climbed under the boat 75 times, lowering the jacks and boat stands. It fit like a glove.


I'm now working on the support bunks. Then the wood can be removed. Lee will be happy about the wood removal because it's a real PIA to get into the boat. Lee needs to take some pictures of the interior as she has done a lot of sanding, filling, and painting. She has started making the new cushions.


120' of piping so far. She is on the second cushion already.
It's been a nice summer here but we are going to head up to San Francisco Bay next week and help Brent move his boat down to Alameda.

Saturday, May 5, 2018

Bottom Is Finished


The bottom is painted. 3 coats of Pettit Horizon. The old waterline stripe is still ugly but will remain until we float the boat. We may want to change the water line height or bow to stern set before painting it red.


Look Ma no hands (supports). This sure made the barrier coat and painting easier. The keel support is painted red because Lee wanted all moving trailer parts red and the fixed trailer parts black. I have cut the last 2 cross members out of the old trailer to make it easier to get the trailer out. I'll give the bottom a couple of days to dry and then remove the trailer. Once the trailer is out we will use Mo's support stands as safety's so Lee can get inside the boat and get back to work.

Sunday, April 29, 2018

Barrier Coat Finally

Started the barrier coat today. No more blue spots.


Just when I think all of the little holes are filled, I find more as the barrier coat goes on. Just 3 spots though. I'll putty them up just before the last coat.

I'm hoping no big wind comes along and blows the boat over as no pads are touching.

The barrier coat epoxy is covering more than I thought so I should be able to get over 6 coats on or about 22 mils. Hopefully I'll have bottom paint on by Wednesday then Lee can get back to work on the inside.

Friday, April 6, 2018

The Old Hobart

30 years ago, when I had my boat business, the guy that was welding up my trailers got tired of me stopping by with work, unannounced. He said I could save a lot of time and money, and headaches for him, if I bought my own welder. He said he would even give me some pointers on welding. His first pointer was a finger pointing in the direction of  TVI, our local vocational technical CC. Well several months later I finished the evening classes, with a couple of nice tool boxes that I welded up,  and fancied myself a welder.

This Hobart has seen a lot of projects from boat trailers, to furniture, to the body I had on my big truck (several different ones), to all the people I had dropping by. When Lee first met me she did not understand why I had a big "NO" painted on my workshop tent when I was in Quartzsite for the winters. It didn't take her long to figure it out. Well here it is the old Hobart on another "big iron" project.


Note the trailer frame is on it's side. I don't like to do vertical or overhead welding and if I can rotate the weld to horizontal I will. With the cunning use of straps, a come-along, and the post holding my awning up and post holding my solar screen I've rolled the frame over a couple of times. I do this solo because I know what can go wrong and don't want anyone to get hurt so don't feel bad I didn't ask for your help. Most of you have bad backs anyway.


Well back to work.

Sunday, April 1, 2018

Pivoting Keel Rest


The keel rest and keel guide are nearing the paint stage. The forward bow stop section is missing and won't go on until the old trailer is cut apart. The side rails are bolted on, instead of welded, to facilitate bottom painting in the future or a different boat.😏


I did a test by clamping a section of steel forward of the pivot point of the same weight and length as the bow stop section and amazingly enough my previous calculations on paper were real close. I will need about 1 cubic foot of fiberglass encased foam mounted to this end (aft) to float the rear of the keel guide.


The spring hangers are tacked in place on adjustable plates .I've run calculations on where to place the axles but don't trust myself to weld the hangers on in a fixed position. With the 2" slipper springs the equalizer hanger was to wide to get a good weld straight to the frame so the 4" plates remedied this problem as well.

Lee continues to work on the interior between cooking for all of the guest we've had over the past couple of weeks.

Saturday, March 17, 2018

Metal Filings Everywhere


The trailer build is underway. Most of the things on my drawings and in my head are working out. I had to cut the tack welds loose on the tongue box and move it about 3/8" to one side. The last cross member was off by 1/8" which put my string off at the tongue by the 3/8". A 4x4 and hydraulic jack took care of the alignment on the rear cross member. Trump cost me an extra $300 on steel so his standing with me is worse than before. 75% of the steel says USS and the other is Canadian.


The blisters have been filled and the barrier coat on the bottom of the keel has been started.


Lee has removed the interior laminate panels and started sanding the wood. It's impossible to sand plywood smooth so another laminate will be used to replace the old cracked laminate.


2 new pieces of firm foam arrived yesterday so Lee can get started on the cushions. Where else do you let compressed foam air up but in the living room.

Well back to work.

Wednesday, February 7, 2018

Moving Along Ever So Slowly

It's been months since we updated the blog even though we have been working on the boat. We sold BareWithUs so now have the funding required to get Toposs in the water. In 2 weeks we have spent over $3500 and it would all fit into a Smiths shopping cart.


Running and standing rigging, roller furler (minus the headstay tube), engine thru hull/seacock, fuel tank hoses, ventilation fan and duct. The new fuel tank should be here any day.

Initially I was going to grind out and fair the large blisters on the hull but decided not to half ass the job and did them all. If the gelcoat was raised at all I ground it out. I found every one by going out at night with a strong flashlight and looking for the shadows.


Brent is going to come over and give me a hand with the fairing compound so we should be able to knock it out in short order. Then comes the almost $600 worth of barrier coat and bottom paint.


I'll spend the next few days, between parties and sailing with friends, fairing and coating the bottom of the keel. I've had to order more epoxy resin and hardener to refinish the rudder. I've got 3 gallons coming so if you need epoxy or cloth, come talk to me.


Lee has decided on fabric for the interior cushions and should get those going in a week or so.

Once the bottom, rudder, fuel system, rigging installed, water pump rebuilt and a few minor things are complete we will put the boat in the water and see how it sails. If I wasn't the procrastinator that I am, the boat could be in the water in March but...

Then on to the interior...

What did I hear you say?  Yes we will have thousands of $$$$ more in to the boat than it's worth but we all have to remember, these are FUN $$$. I've never regretted any of the fun money I've spent in the past 50 years. Makes for a great life.

Sunday, September 17, 2017

A Milestone Today

The weather has been perfect since we returned from Flagstaff so I got back to work. I finally finished removing the old bottom paint and some coating that was probably an attempt at barrier coat. I found a few more blisters but none were harming the skin out mat under the gel coat. About 20 total and the largest was the size of a dime but most less than a 1/4". A little clean up of some areas and the boat will be ready for a new barrier coat. I'm going with the Sea Hawk Tuff Stuff like I used on the O'Day. It goes on a a little rough (light orange peal) but I'm going to try a new method of application. The barrier coat is going to have to wait until the temps drop, probably mid October.


The other good news, the family accountant said she would like to get TOPOSS sailing before we part with the O'Day. New running and standing rigging will be ordered by the end of the month. I'm trying to decide if we want to raise the boom before we order a mainsail. We will lose about 9% of the mains sail area but it's a cruising boat, right. We are going to get a VX One for our go fast boat.

https://www.youtube.com/watch?v=T0j8cJrlTtA

Friday, August 11, 2017

In The High Country

We went home a few days ago and the old S2 was just sitting in the sun waiting for cooler weather. If the trailer was fit for travel I might have brought TOPOSS to Flagstaff and worked on it here in the maintenance yard. The weather is perfect, except for some rain. We may bring the O'Day back with us next time and head up to Lake Powell for a week or so after our job is over.

The vacation from the S2 is really making me want to get home and get it in the water.

Thursday, April 27, 2017

Not Much Work on TOPOSS Lately


I've been working on the O'Day and our backyard wall so the S2 has taken a backseat. The wall has the brown coat on and the finish will go on the end of May. Plus the O'Day spent a week in San Diego with the SoCal Potters.

I got a little depressed after corresponding with Geno about centerboards. He has sailed an 8.0C a lot and knows the performance CB down and CB up. With the high free board I never expected the boat to go to windward as well as our O'Day but It's a cruising boat right. Plus I've got 30 HP and 20 hours of fuel if I need to get to windward if we are in a hurry. Oh yea, Geno tells me his diesel gets 4.5 hours to the gallon. Maybe we will install a ...... ouch, stop Lee, I was joking.

The lack of CB has my brain thinking and researching, maybe a couple of those curved lee boards or two bilge mount high lift boards mounted at an angle so the windward one is clear of the water at 10° heel and I retain shoal draft.

Anyway the floor board is drying well and actually becoming stiffer. The soft spots are almost gone. I'm going to get to work on the bottom tomorrow after a bicycle ride and run the engine a few minutes because it starts so well and sounds so smoooooth with no vibration. Take that you diesel guys.

Well anyway here is a video by Geno who sails the Great Lakes and the Caribbean with his S2 just so our readers know what this boat can do..

 
https://www.youtube.com/watch?v=SU0ULUxG-rI&google_comment_id=z134tpeg2tb4jl4u423eydfg0zb4zt1hy04

Sunday, April 2, 2017

Water Where It's Not Supposed to Be

This boat has a sealed (supposedly) bilge under the floor boards. It also has a deep bilge in the aft section of the keel. These 2 are not connected. I kept seeing moisture around the ice box drain hose where it entered this bilge area.The only way I can see for water to get into this area is from rain (hatch left open at some point) and through a small opening around the ice box drain hose. This hose continues through and into the deep bilge.

I drilled a 3" hole into the floor and found the bilge full of water. I drilled about 10 more holes sucked all the water out then ventilated it for a few days. I then filled the bilge full with bleach to kill mold and mildew. Dried it out again and filled it full of antifreeze to kill rot bugs in the wood. Removed this and have been ventilating the area for a couple of weeks with forced air. The plywood floor lamination's are still good from checking my hole samples.


The sole (floor) has started to firm up and not flexing as much with the wood drying.

I also continue to remove paint from the bottom in hopes of getting a barrier coat on before it gets to hot.

Lee has more fabric samples and is beginning the process of measuring for new cushions.

We also found someone to correspond with that has an 8.0 C.

Tuesday, February 28, 2017

We are still working on TOPOSS

Raised the mast for standing rigging measurements. Biggest question was mast rake. I've decide to measure with no mast rake and order the head stay a little long, turnbuckle closed 2/3 instead of 1/3 for plumb mast. This should give me the ability to rake the mast about 14" if my trigonometry is correct.


The prop shaft was cleaned and checked for straightness. I installed a new stave bearing (cutlass), and hose between shaft log and packing gland, and GRU (not the Russian spy agency that got...) packing into the cleaned gland.


The hose had to be sanded a little on one side, to get it to fit in that tight area. Hopefully I can get a strap wrench in there to tighten the packing nut.


The prop is installed loosely so Kim (my neighbor) can take it off and shine it up for me in his spare time.

Oh the rudder...

The repairs that someone had started were, lets say, HALF ASS. I'm stripping all of the old repairs off (easy since they aren't laminated very well) and opening up the edges to dry. I will dig around the shaft on the lower end here and check for corrosion at the weld for the blade structure that sticks into the rudder (to keep the shaft from spinning inside the rudder). Wish me luck.  What do you think of the new South Dakota license plate design?

Almost forgot about the teak project Lee is working on.


She pulled about 40 pieces from the interior (Just the forward cabin) and meticulously labeled each one. Well... she found out how good that teak cleaner, in the picture, does it's job. She now has a jigsaw puzzle when she goes to install her nicely brightened teak. Yep, took  that Sharpie ink right off. At least one side has counter sunk holes so she know which side faces out. Good luck Wendy.


The WALL is almost ready for stucco so after that we can really get going on the boat.

Wednesday, January 25, 2017

Lucky Me

After the run around the bay the other day I decided it was time to fix the leak around the propeller shaft. The packing gland had 40 years of corrosion and no way to get a wrench on it given it's tight location. In the process of uncoupling the hose between the boat (shaft log) and gland I discovered what 42 years does to a length of rubber hose. So much for a somewhat easy fix, the shaft has to slide back and engine mount flange has to come off the end. Tap tap tap for 2 hours with a hammer and the flange is off. I slide the gland off. With the shaft loose I'm wondering about the stave bearing since the shaft has a lot of movement. Now I could have spent a few hours on the internet researching the answer to this stave bearing issue but why, I have a master at boat rebuilding as a neighbor. Lucky Me.

He was there in a flash, wiggled the shaft, scratched around with his knife, and confirmed the need to replace said bearing. We BS for a while and decide the rudder has to be removed to get the shaft out. It was late and we call it a day.

Now for you non nautical term folks, a stave bearing is sometimes referred to as a cutlass bearing which is not to be confused with a cutless bearing, a trademarked name for a stave bearing by the Johnson company. (Do I need more commas in that run on sentence?) The word cutlass was coined after the Johnson copy write. a and e makes all the difference. I had to endure much discussion on the internet about these terms when all I wanted to do was order the damn bearing.


The next day I'm messing about pricing tires for the O'Day trailer for the upcoming Mohave trip and meet the Lovely Lee for lunch. While eating lunch said neighbors wife and daughter appear and tell me that neighbor has been over several times to work on the S2. Well what would you do. I rush home, after stopping at Smiths to use the fuel points and save $24 on the 30 gallons of diesel for the truck. Lucky Me.

I start pulling the steering quadrant from the rudder post and just when I need help the neighbor appears like magic. Lucky me. He wiggles the rudder out while I hold the quadrant. We thought it might be more difficult since I could not break the rudder post packing gland loose under the quadrant. Urrr packing glands.

He had mentioned that the prop shaft zinc should have been tighter and then showed me the reason why after pulling the shaft. Some pit corrosion where the shaft runs in the stave bearing. We decided it was not bad enough to buy a new $300 shaft. Lucky me.

I had sanded the tube (shaft log) holding the bearing in search of finding set screws that hold the bearing to no avail. We decided to pound away with a socket that he provided that fit perfectly in the log. ( I will leave my log jokes out for now)  It starts moving and after a couple of minutes he calls for the pounding to stop. He scratches around and finds the set screw under the one piece of paint that remained and removed the screw. A few taps later and the bearing was free. Lucky me.

Wow things are going pretty good. Why don't we pull the prop from the shaft? We soak things in muriatic acid for a few minutes and give the nut a try. It comes right off. Lucky me. Hell lets see if we can get the prop off. I search the garage for my puller and conclude I loaned it to someone or gave it away. I guess that's one in the same if I no longer have it. While neighbor is designing a puller in his mind and holding the shaft I start with the old 16 oz tap tap tap. After a couple of minutes, nothing. I call for a 90 degree spin of the shaft, one more tap and I'm thinking of getting on the ferry to the casino.

OK my luck has to stop somewhere, let's see if the rudder stock packing nut will separate. I really don't want to pour acid in there, the stink might never go away. There is barely enough room to get the pipe wrench in the compartment. He holds the wrench and I hammer with the 16 oz and "guess what? Caroline", your God in heaven, it came loose.

We stand around and look at the parts and BS for a while with Juan and the neighbor calls it a day. Juan and I retreat to one of my other projects, The Wall (to keep non thinking people out) and he gives me a fantastic price to apply the stucco. Lucky me.

I go in. Maybe I'll get Lucky.


Ordering the parts, had sex earlier

Friday, January 20, 2017

IT LIVES!

Wednesday, January 18, 2017

We just sacrificed our Hobie tandem kayak for funds for TOPOSS.  So before we start spending HUGE amounts on this old piece of shit, we thought we should make sure she floats and doesn't have structural damage that would negate this entire project.  (Why DO we buy boats that we've not seen on the water????  Because they're there....).

So we took her down to the marina and slid her into the water.  Since Rick has not had time or money yet to build this trailer into a fantastic one like the O'Day's, we did the old chain extension method (no tongue extender on this trailer).  Oh, and I might add there is no tongue wheel on the trailer either.  So my ingenious husband welded a ball hitch onto a hand cart to suffice for that!!

Rick even had to get WET to launch this time.  For that, he resurrected his 1975 farmer-john wetsuit from his Hobie racing days.  They were a little sketchy in the butt.   (Ha, should've gotten a picture of THAT!)

Craig Daniel and Richard Sexton were there for the show and to assist.  I wonder if they had any wagers going on....

The Atomic 4 engine fired right up, rich and sassy with racing fuel.  So we decided to motor around the bay for awhile -- a risky proposition since we had no oars in case A4 bonked.  While out there, we encountered our resident favorite photographer, Carolyn Wilcox and husband Richard, out for a sunny afternoon on Catnap.  She got some great photos of TOPOSS' maiden cruise.  For the record, from what we can tell, the last time this boat has been on the water was 2001....


Wow!!  What a nice surprise...not only does she FLOAT just fine, but that A4 is the bomb!  It purrs!!  Supposedly 30 hp -- just dilly-dallying we almost made a wake -- can't imagine what we could do full open throttle.  Don't think we'll have any trouble fighting the winds on Yellowstone Lake with this boat.  (FYI, we struggled on the O'Day the year before last trying to get back to harbor against a 30 knot headwind, with gusts over 40, on Yellowstone.)  And, this boat turns on a dime.  Better than the O'Day.  Seems to pivot around the steering wheel.  Oh yes, and the wheel.  My first wheeled boat.  (A wheel for Wheeler???? Ok, that's dumb.)  Well, I like it.  In fact, I liked TOPOSS a great deal more after this cruise and feel pretty good about opening up that hole in the water and throwing money into it.